Leverage mParticle’s data quality developer tools to create, implement, and QA a data plan
mParticle makes it easy to create a robust data plan, implement it with ease, and seamlessly check incoming events to prevent bad data from making its way to downstream systems. Here, we walk through all three steps in a sample application.


When The Beatles sang “And in the end, the love you take is equal to the love you make,” they didn’t have customer data in mind. In fact, no one had the faintest idea what that meant when they recorded the song in 1969. But there’s a broad meaning in these words that works for our purposes: What you collect is what you expect… at least ideally.
Whenever you collect data from a website or app, you can’t just grab any attribute names and data types at random, forward them to the systems where they’re needed, and consider your data-related responsibilities complete. Typically, you need to implement event collection in a way that aligns with a data tracking plan. This modeling is usually developed by the marketing or product teams, and data engineers often have input at this stage as well. Once you’ve instrumented event collection according to this plan, which in itself can be a laborious task, you’re only done with half the battle. You still need to make sure the data being received really is what has been planned for––in other words, that the data you collect is equal to the data you expect.
In this post, we’ll see how to handle the following steps using mParticle and a sample eCommerce application:
- Creating a data plan within the mParticle UI
- Instrumenting that data plan using mParticle developer tools
- Examining data events in real time with the mParticle Live Stream
- Using Live Stream to easily identify incoming data that does not line up with what is expected
- Rectifying this error in the event collection code
- Using Live Stream to verify that the updated events are correct


Step 1: Create a Data Plan in mParticle
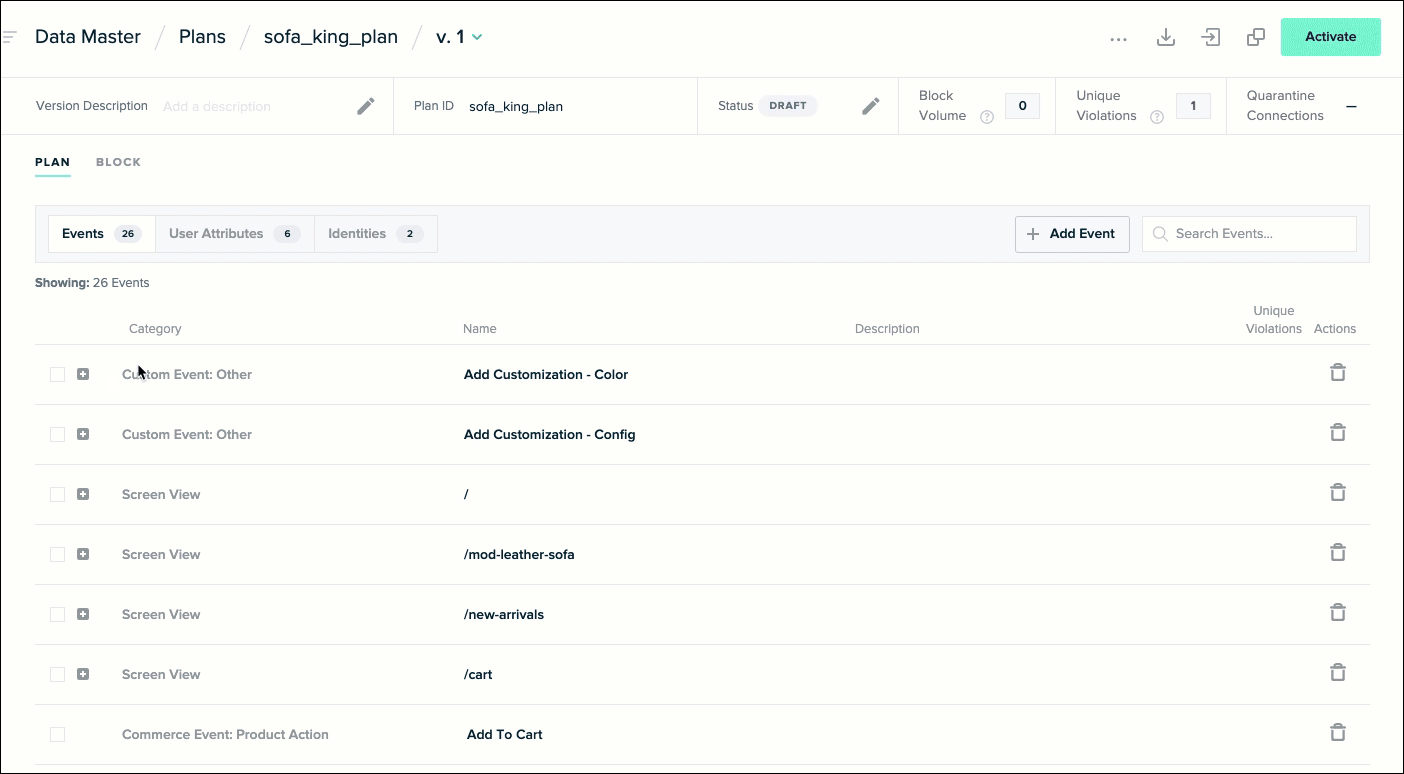
Within an mParticle workspace, Data Plans define the expectations for the shape and extent of the data you send to mParticle. Each Data Plan contains self-identifying information like an ID and version number, as well as information describing each of the plan’s data points including event names, event attributes, and the expected data types. Non-technical stakeholders can create Data Plans and define rules for each data point inside of the mParticle UI:
Step 2: Fetch your data plan as JSON
Once you have at least one Data Plan in your workspace, you can use the mParticle CLI to fetch it and store it in your project. To do that, you’ll need a file called `mp.config.json` at the root of your project:
mp.config.json
{
    "global": {
      "workspaceId": "YOUR WORKSPACE ID,
      "clientId": "YOUR CLIENT ID",
      "clientSecret": "YOUR CLIENT SECRET"
    },
    "planningConfig": {
      "dataPlanId": "sofa_king_plan",
      "dataPlanFile": "data_plans/sofa_king_plan.json",
      "versionNumber": 1
    }
  }
The `global` object here is your workspace authentication. The `planningConfig` object tells the CLI about the Data Plan you’d like to fetch, and specifies a local directory in which you’d like that data plan saved. With `mp.config.json` set up appropriately at the root of your app, you are ready to fetch your Data Plan with the CLI by running: `$> mp planning:data-plan-versions:fetch`.
Step 3: Instrument event collection based on your Data Plan
With your Data Plan stored in your project as a JSON object, you are ready to actually implement data collection. Luckily, mParticle provides tools that drastically simplify event collection and enforce the rules of your Data Plan directly in your IDE. One of these tools is Smartype. One of Smartype’s key features (among several) is the ability to automatically translate your data plan into usable libraries with a single CLI command. Once these typesafe libraries are in your project, Smartype provides autocomplete and linting features that make it virtually impossible to collect data that does not conform to your Data Plan. This post goes into detail on how to set up Smartype and use it for this purpose.
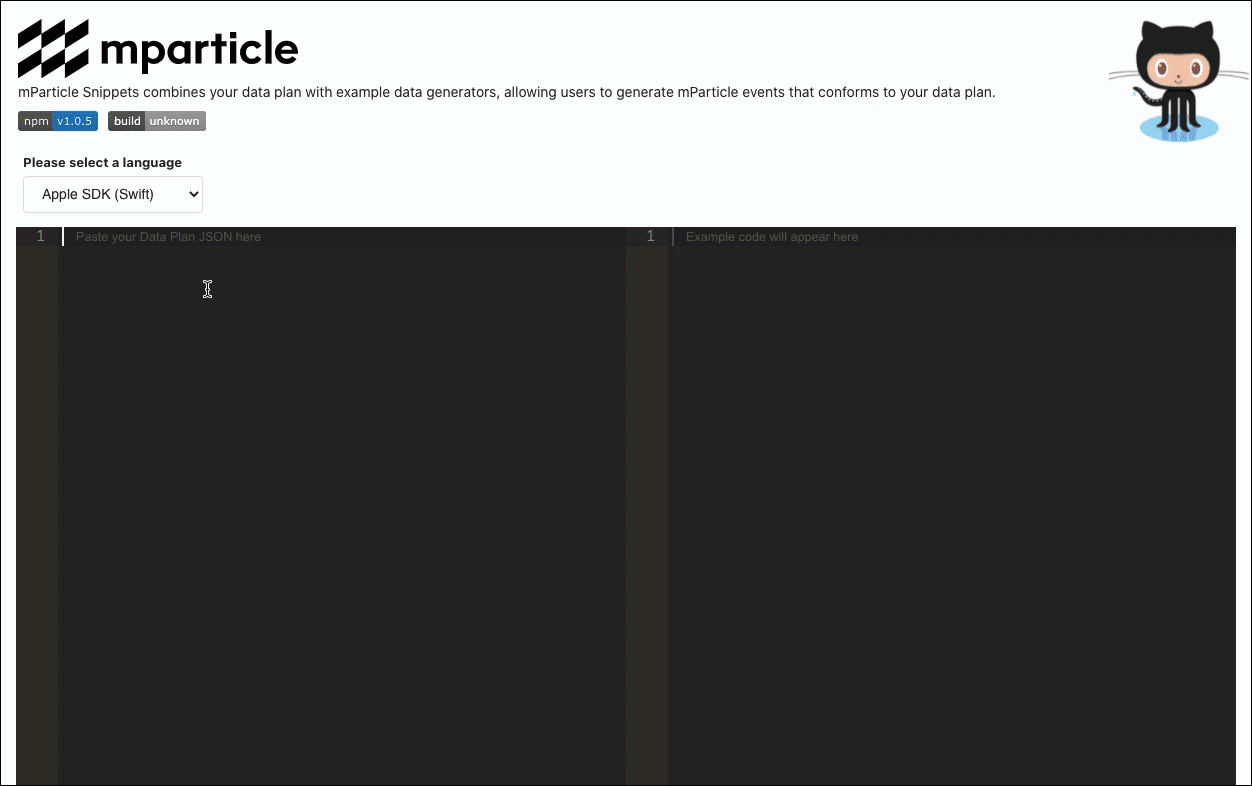
Alternatively, mParticle’s Data Planning Snippet SDK helps streamline data collection and prevent errors in the process. This SDK ingests individual data points from your Data Plan, and translates them it into executable code inside of an interface in which you can copy-paste your Data Plan and generate event collection code:
Step 4: Address data errors in real time
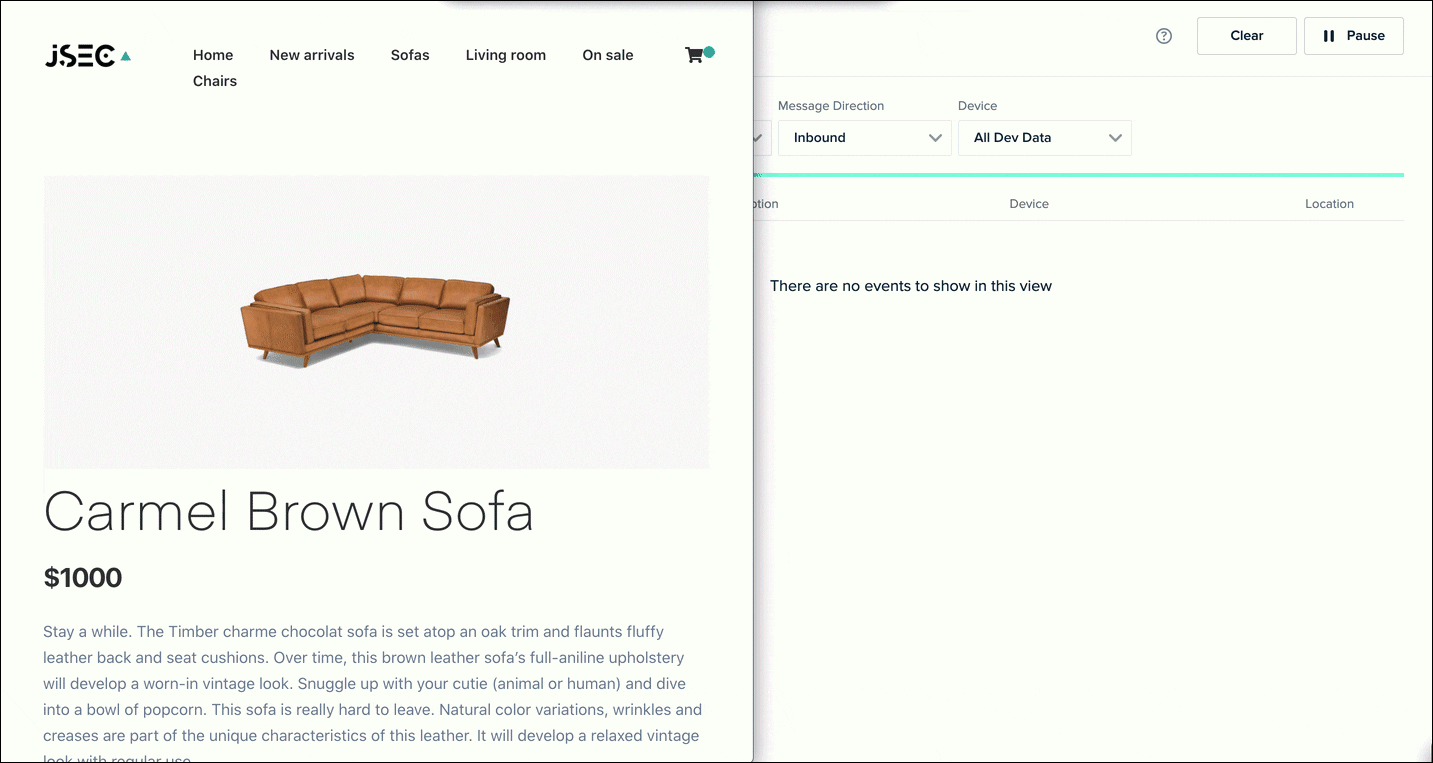
With event tracking instrumented across our application, you can now see events coming into the Live Stream in real time:
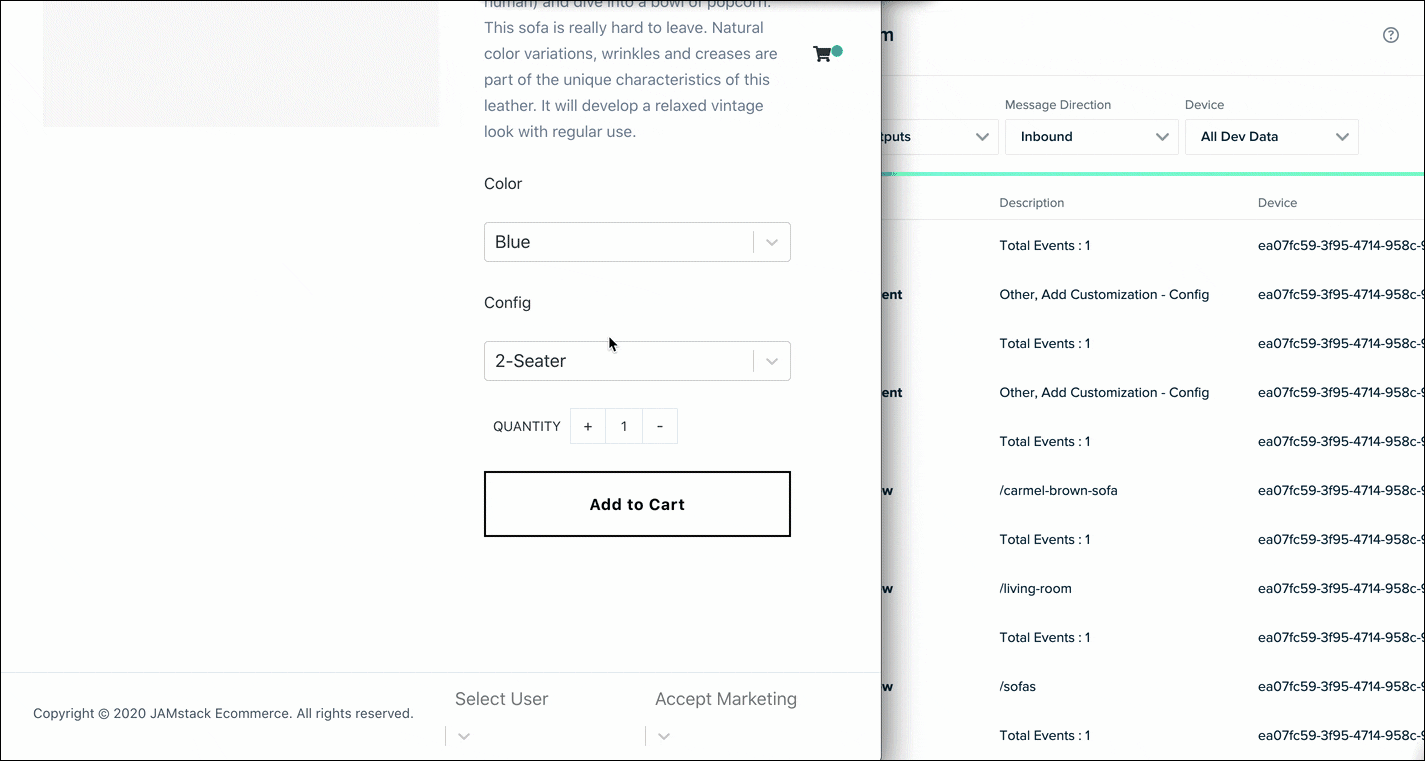
All of our `Screen View` events and `Custom Events` for color customization are arriving in mParticle the way we expect them to! No problems there. It looks like we have an issue when a customer changes the configuration to “3-Seater,” however. Let’s take a closer look:


This `Custom Event` is set to accept one of three enumerated values: “two seater,” “three seater,” or “sectional.” Somehow, we misspelled “three seater” as “three seeter” in our code. Let’s visit the `ItemView.js` component in our application where this event collection code lives:


There is a typo in the value set in the configuration options for this event, and this incorrect value is getting passed to mParticle when we make our API call. Let’s correct the spelling there and see what we get in Live Stream:
Problem solved! Our `Custom Event` for product configuration now aligns with the data plan, and we were able to easily triage and eliminate this error in the source code after seeing it reported in real time.
Having the ability to view data coming into mParticle in the Live Stream gives complete transparency into the data you’re collecting and sending, and eliminates any ambiguity about whether your events match their specification. Additionally, there is no need to wait to validate your data, since the Live Stream delivers real-time access and quality checking. Between mParticle’s Data Planning API, Data Live Stream, and CLI, you are in complete control of the entire data collection lifecycle.
Feel free to fork or clone this repo and play with this project yourself! While you won’t be able to view events coming into Live Stream without an mParticle workspace, you can experiment with using Smartype to add additional events throughout the UI and validate them against the Data Plan that is currently saved as JSON. By the way, if you’re a startup, you can get free access to mParticle with our Accelerator program.


Latest from mParticle


Try out mParticle
See how leading multi-channel consumer brands solve E2E customer data challenges with a real-time customer data platform.
Startups can now receive up to one year of complimentary access to mParticle. Receive access