Instrument your mobile app with Swift and mParticle
Learn how to instrument your app with Swift using the mParticle SDK.


Let’s say you are an app developer and have decided it’s time to create a new app. Or maybe you would like to refactor parts of an existing app, or just want to experiment with new technology. Whatever your reason may be, Swift is now a viable choice for developing your iOS apps (OS X as well, but we will be focusing on iOS in this article).
Augmentation and instrumentation are likely among the things that you will want to implement in your app. These two things will enable you to learn about usage patterns, behaviors, and create audiences to interact with your users. Learning from and communicating with your users is necessary to maintaining a high degree of engagement (MAU), which directly correlates to the success of your app in the marketplace. The choice of an SDK to help you in this task is an important decision, so today we’re going to show you how to instrument your app with Swift using the mParticle SDK.
After downloading the mParticle SDK you will need to add it to your project, which can be done manually or via CocoaPods – you can find out more on the mParticle website. In order to use the mParticle SDK in your Swift project, you will need to either create a bridge between Objective-C and Swift or configure an already existing one. Next, we will walk through the needed steps to get everything up and running – so let’s get started.
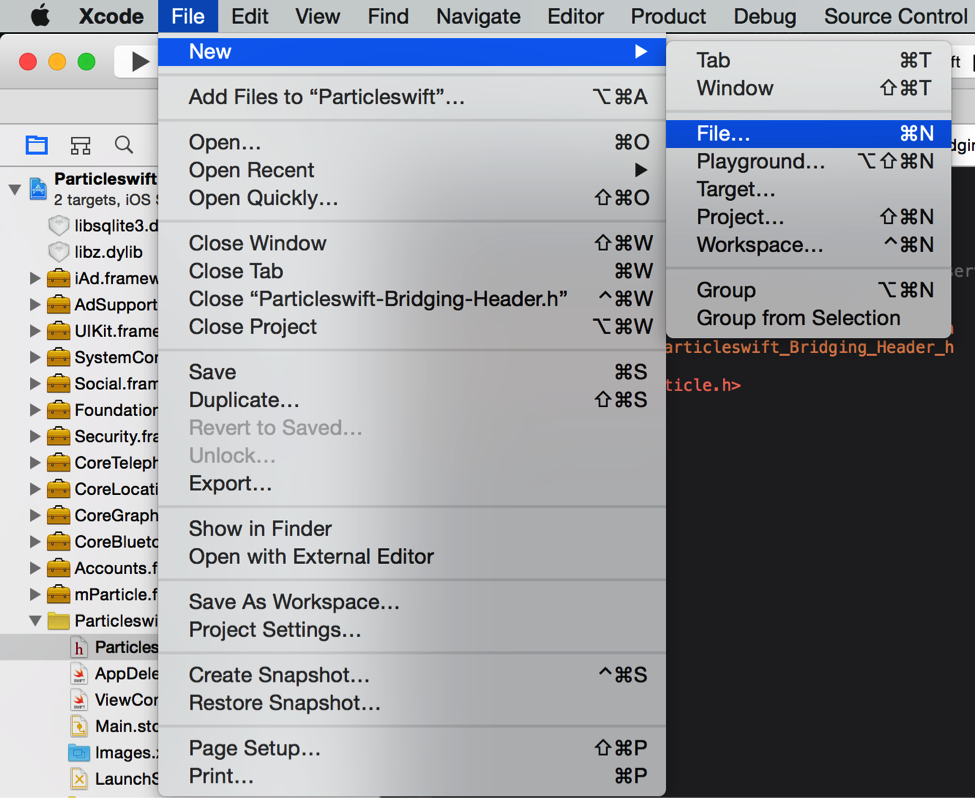
First things first, if your Xcode project does not already have an Objective-C Swift bridging header then you will need to create one. To do this choose: File > New > File…
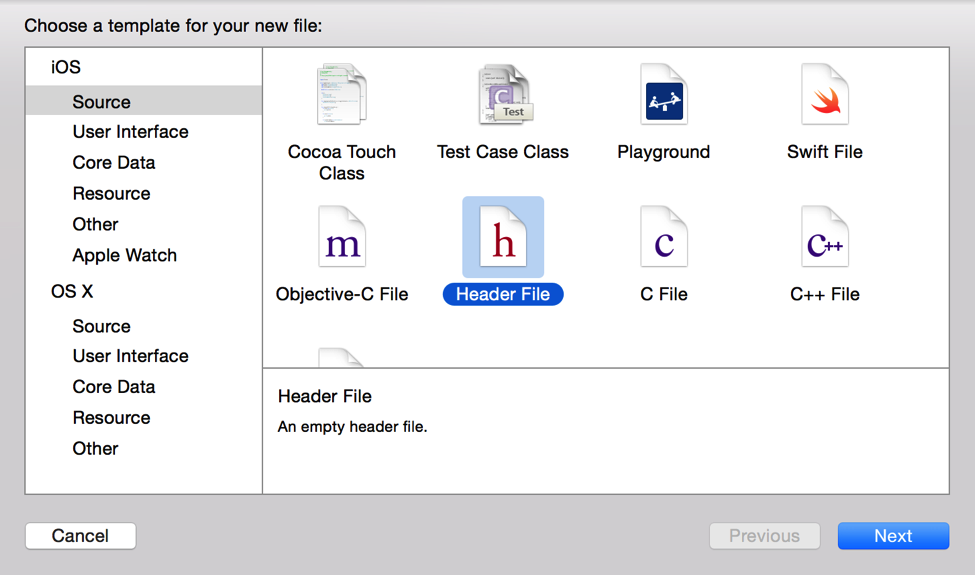
Next, a modal window will appear offering a few options for the new file to be created. From the left-hand column choose: iOS > Source, then from the center panel select: Header File. Once the options have been selected press the Next button to continue.
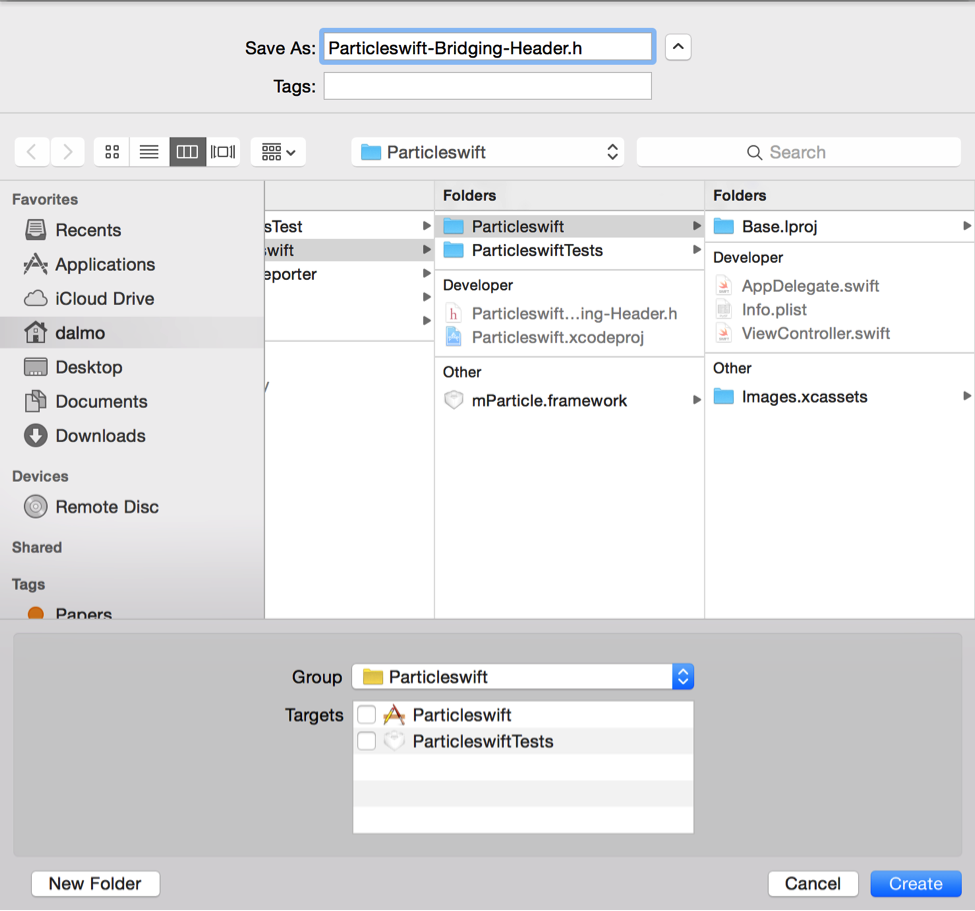
The following screen will ask you the name and location of the header file. When naming it, add “-Bridging-Header.h” as a suffix. It is common practice to name the bridging header file after your project’s name, however, that isn’t necessary here – you can use any alphanumeric name starting with a letter. Once you have chosen the name and location, click on the Create button.
In our example, we named the bridging header file as “Particleswift-Bridging-Header.h” and saved it in the project’s root directory.
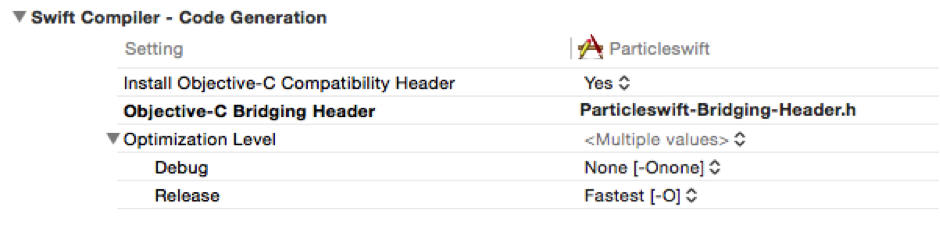
We are almost there – you just need to make one more configuration to your Xcode project before you can edit the bridging header file. Go to the project’s Build Settings, scroll to Swift Compiler – Code Generation, and set Objective-C Bridging Header to the location of your bridging header file, relative to your project’s root directory.
In our example, since the bridging header file is in the project’s root directory, we just need to enter the file name.
And that is it – the bridging header file has now been created and configured in your Swift project. Next, you just need to inform all headers that should be bridged from Objective-C to Swift. For our example we will only import the mParticle.h header, however you may have more headers to be imported.
#ifndef Particleswift_Particleswift_Bridging_Header_h
#define Particleswift_Particleswift_Bridging_Header_h

#import <mParticle/mParticle.h>

#endif
Now the mParticle SDK will be available in Swift. Let’s see a few code examples:
The only required step is to start the mParticle SDK, which can be done in the app delegate after your app has finished launching.
func application(application: UIApplication, didFinishLaunchingWithOptions launchOptions: [NSObject: AnyObject]?) -> Bool  {
    if let mParticle = MParticle.sharedInstance() {
        mParticle.startWithKey("<<Your App Key>>", secret:"<<Your App Secret>>")
    }

    return true
}
As users become engaged in your app, you may want to start logging events, transactions, setting user identities, etc. The complete documentation for this can be found on the mParticle Documents Page and is also deployed with the SDK, which can be integrated into Xcode. In addition, clicking on a method or property while holding the “option” key will display a brief summary in a popover.
func logEventsExample(button: UIButton) {
    let mParticle = MParticle.sharedInstance()

    // Logging and event
    let event = MPEvent(name: "Food Order", type: MPEventType.Transaction)
    event.info = ["spice":"hot",
                   "menu":"weekdays"]

    mParticle.logEvent(event)

    // Logging an eCommerce transaction
    let product = MPProduct(name: "The next book in my reading list", category: "Books and Magazines", quantity: 1, totalAmount: 9.99)
    product.unitPrice = 9.00
    product.affiliation = "My favorite retailer"
    product.sku = "xxx-yyy-zzz"
    product.taxAmount = 0.99

    product["cover"] = "Paperback"; // Custom key/value pair

    mParticle.logTransaction(product)
}

func setUserIdentityExample() {
    let mParticle = MParticle.sharedInstance()
    mParticle.setUserIdentity("0123456", identityType: MPUserIdentity.CustomerId)
    mParticle.setUserIdentity("user@email.com", identityType: MPUserIdentity.Email)
}
There you go. We successfully added a bridging header to your Swift code, configured your Xcode project, and saw some examples of instrumenting your app with the mParticle SDK.
Happy coding!


